What Is the Maximum Practical Depth for a Wood Floating Shelf (10″-12″)?
{“title”:”What Is the Maximum Practical Depth for a Wood Floating Shelf (10\”-12\”)?”}
Understanding the maximum practical depth for a wood floating shelf (10″-12″) is essential for anyone aiming to balance aesthetic appeal with functional storage. While these dimensions provide a generous surface for books or kitchenware, they also increase the mechanical strain on your wall assembly.
By mastering the physics of leverage and mounting, you can securely install deeper surfaces without compromising the structural integrity of your room. This article helps you determine if your wall can handle the load and which installation techniques ensure your display remains perfectly level and safe for years to come.
Before you commit to a shelf depth of 10 to 12 inches, you must look behind the drywall. A floating shelf relies entirely on the connection between the mounting hardware and the wall studs.
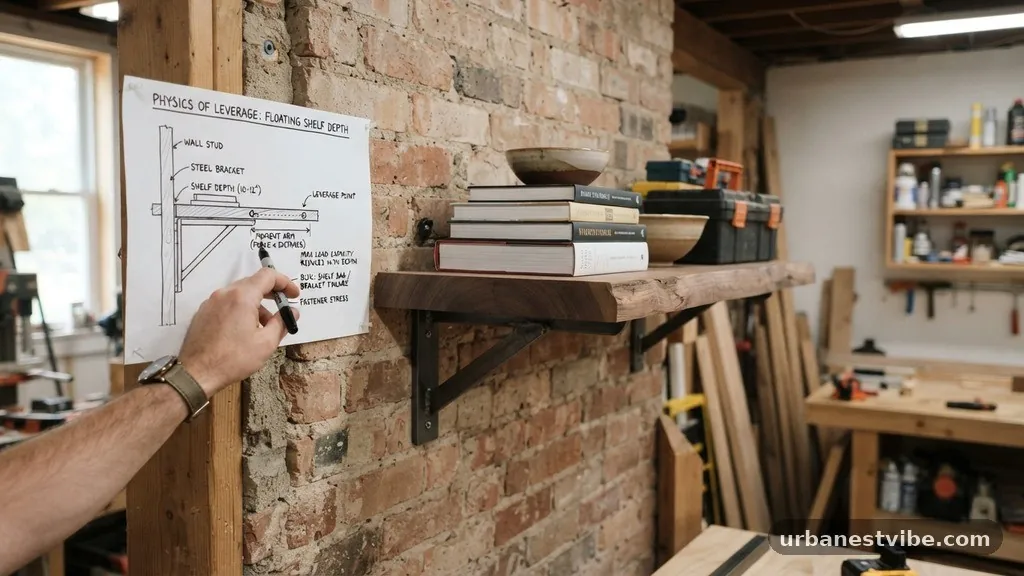
When you extend a shelf to 12 inches, you are effectively creating a long lever arm. Every pound of weight placed near the outer edge of the board exerts significantly more force on the mounting points than it would on a shallower shelf.
Most residential construction uses 2×4 or 2×6 studs spaced 16 inches apart on center. If your intended shelf location does not align perfectly with these studs, you have a major problem.
You cannot rely on drywall anchors to support a deep, heavy wood shelf. Even heavy-duty toggle bolts, which are excellent for lightweight art, are not designed to withstand the persistent downward torque of a 12-inch deep shelf loaded with heavy items.
A common mistake is assuming that a “heavy-duty” bracket will compensate for a lack of stud engagement. It won’t. If you cannot hit at least two studs with your hardware, you need to reconsider your mounting strategy.
You might need to install horizontal blocking behind the drywall or use an external mounting cleat that spans multiple studs to distribute the load effectively. Always prioritize the connection to the building frame over the aesthetic desire for a deeper shelf.
The Physics of Leverage and Shelf Depth

The primary challenge with deep floating shelves is the relationship between the depth of the board and the length of the internal support rods. To maintain a truly floating appearance, the support mechanism must be hidden inside the shelf itself.
As the shelf depth increases, the internal support rods must also become longer to provide adequate leverage. A 10-inch deep shelf requires rods that penetrate at least 8 to 9 inches into the wood to prevent the shelf from sagging or pulling away from the wall.
When you push the maximum practical depth for a wood floating shelf (10″-12″), you are testing the limits of the hardware. The torque generated at the wall interface grows exponentially as the shelf extends further from the surface.
If the bracket is too short, the weight of the items will cause the shelf to tilt downward, creating a gap between the back of the wood and the wall. This not only looks unprofessional but also stresses the mounting screws, risking a sudden failure.
To mitigate this, ensure the diameter of your support rods is sufficient. Thinner rods will flex under the weight of books or kitchen stoneware, even if they don’t break.
Aim for solid steel rods with a diameter of at least 5/8 inch for shelves reaching the 12-inch mark. If you are using a hollow-core shelf design, ensure the internal frame is reinforced to prevent the wood from splitting under the pressure of the rods.
Selecting the Ideal Wood Species for Weight and Stability
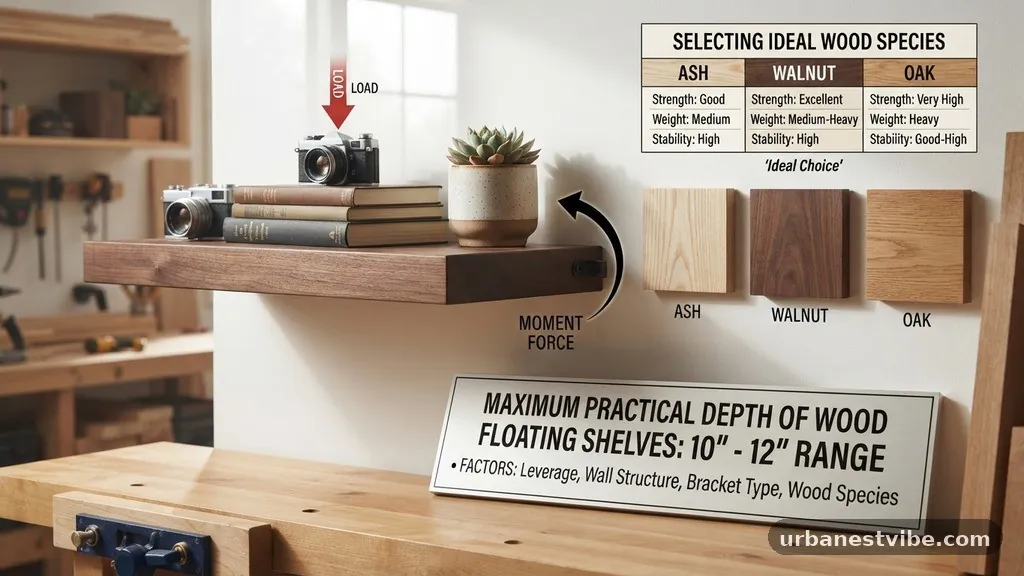
The weight of the wood itself contributes to the total load your wall must support. A 12-inch deep shelf made of solid white oak or walnut is significantly heavier than one made of pine or paulownia.
While hardwoods offer superior durability and aesthetic value, their density means you need to be extra cautious about the mounting hardware’s capacity. If you want a deep shelf, lighter woods might be a more practical choice if you plan to store heavy items.
Consider the moisture content of the wood you choose. Natural wood is a living material that expands and contracts with changes in room humidity. A wide, deep board is more prone to warping or bowing over time than a narrower one.
To minimize this, use kiln-dried lumber and avoid boards with high grain tension. If you are building a custom shelf, you might want to use a glue-up technique rather than a single wide slab to improve dimensional stability.
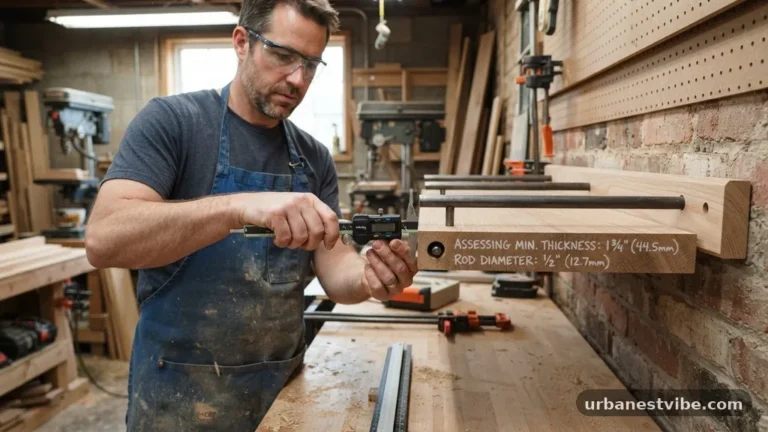
One common mistake is using wood that is too thin for the depth. A 12-inch deep shelf should have a thickness of at least 1.5 to 2 inches. A thin, deep board will look flimsy and will be physically incapable of hiding the robust hardware required to support it.
The thickness of the wood provides the “meat” needed to house the support rods securely. If you use a board that is only 3/4 inch thick, you will struggle to find hardware that fits without showing through the top or bottom of the wood.
Mastering the Installation Process
Installing deep floating shelves requires precision. Because you are dealing with a 10-12 inch projection, even a tiny error in the alignment of your mounting rods will be magnified at the front edge of the shelf. If your rods are angled slightly downward, your shelf will droop.
If they are angled upward, the shelf won’t sit flush against the wall. You need to use a high-quality level to ensure every rod is perfectly perpendicular to the wall.
Start by marking your stud locations clearly. Use a stud finder and verify the edges of the studs with a small drill bit if necessary. Once you have your layout, use a template to mark the holes on the back of your wood shelf.
If you are drilling these holes yourself, a drill press is highly recommended. Hand-drilling deep holes into the end grain or back edge of a shelf is notoriously difficult to keep straight, and a crooked hole will ruin your board.
Another frequent error is failing to account for the thickness of the drywall. If you are mounting the bracket directly to the studs, the thickness of the drywall must be subtracted from the rod length to ensure the shelf sits tight against the wall.
Some professionals prefer to cut away the drywall in the mounting area and install a plywood backer board that is flush with the studs. This provides a rock-solid, flat surface for the bracket to mount against and ensures the shelf is perfectly square.
Optimizing Storage and Load Management
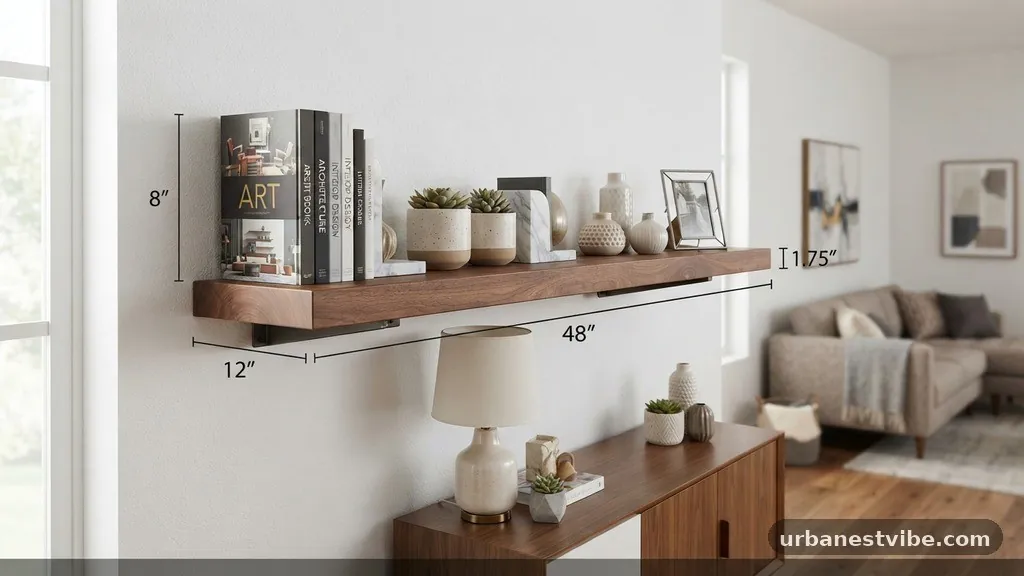
Once your shelves are installed, how you distribute items matters. A 12-inch deep shelf is perfect for kitchen floating storage, such as stacks of plates, bowls, or a collection of jars. However, you must avoid placing all your heavy items on the outer edge.
This creates the maximum amount of torque on the support system. Always place the heaviest objects as close to the wall as possible.
Think of your shelf as a cantilever beam. The area near the wall is the most stable, while the outer few inches are the most vulnerable.
If you are using these shelves for books, place the spines facing out, but keep the bulk of the weight toward the back. For kitchen use, store heavy cast iron or ceramic pieces on the lower shelves if possible, or distribute them evenly across the length of the shelf rather than clustering them in the middle.
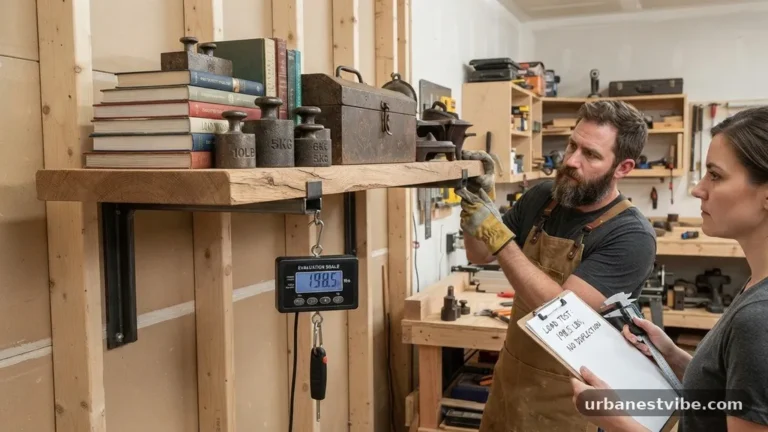
Be mindful of the total weight capacity specified by the manufacturer of your brackets. If you are using custom-made brackets, calculate the load based on the shear strength of your fasteners.
A good rule of thumb is to assume your shelf will carry at least 20-30 pounds per linear foot. If you are storing heavy items, you may need to increase the number of support brackets to ensure the load is shared across more studs.
Aesthetics and Visual Balance in a Room

A 12-inch deep shelf is quite substantial and can easily overwhelm a small room. When planning your design, consider the scale of the surrounding furniture.
If you have a small space, a shelf that is too deep can make the area feel cramped or cluttered. Conversely, in a large, open-concept kitchen, a 12-inch shelf provides a necessary sense of scale and utility.
The visual weight of the shelf can be managed by the finish you choose. A light-colored wood or a painted finish that matches the wall color can make a deep shelf feel less intrusive.
If you prefer a bold, dark stain, be prepared for the shelf to become a focal point of the room. You can also play with the thickness of the shelf; a “chunky” 3-inch thick shelf looks more intentional and balanced at a 12-inch depth than a thinner, 1-inch board, which might look out of proportion.
Avoid overcrowding the shelf. One of the main benefits of floating shelving is the clean, minimalist look. If you fill every square inch of a 12-inch deep shelf, you lose that airy, open feel.
Use the extra depth to create layers—perhaps a small plant in front of a framed print—rather than simply adding more items. This adds visual interest without creating a sense of visual chaos.
Maintaining Your Shelves Over Time
Floating shelves are not “set it and forget it” installations. Wood is dynamic, and the heavy loads placed on deep shelves can cause microscopic shifts in the mounting hardware over time.
Make it a habit to check the stability of your shelves every six months. Look for any signs of sagging or gaps opening between the shelf and the wall.
If you notice a slight droop, check the mounting screws first. Sometimes, the screws holding the bracket to the wall can loosen due to the constant vibration of household activity or the natural settling of the home.
Simply tightening these screws is often enough to restore the shelf to its proper position. If the wood itself has bowed, you may need to remove it and sand the back edge, or in extreme cases, replace the board.
For those interested in the engineering standards for shelving, you can find helpful resources on technical load requirements at the Architectural Woodwork Institute. While their standards are often geared toward commercial applications, the principles of joinery and structural integrity are directly applicable to your residential projects. Keeping your shelves clean and free of excess moisture will also ensure the finish stays protected and the wood remains stable.
Troubleshooting Common Installation Issues
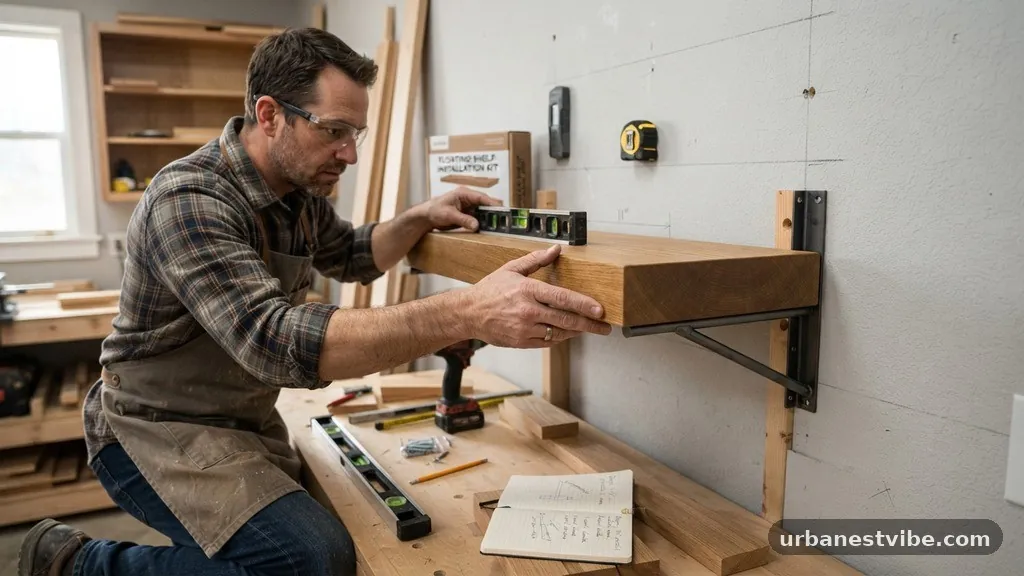
Even with the best planning, things can go wrong. If you find that your shelf is not sitting level after installation, don’t panic. Many professional-grade floating shelf brackets come with built-in adjustment screws.
These allow you to fine-tune the pitch of the rods by a few degrees, which can make a huge difference in the final appearance. If your brackets don’t have this feature, you can use thin shims between the bracket and the wall to nudge the angle.
What if the shelf hits a stud that is slightly bowed or twisted? This is common in older homes. If the bracket doesn’t sit flat against the wall, it will pull the shelf out of alignment.
Use a hand plane or a belt sander to flatten the drywall area or the back of the shelf itself. Taking the time to ensure a perfect, flush fit at the beginning is much easier than trying to fix a leaning shelf once it is fully loaded.
If you are worried about the shelf sliding off the rods, use a small set screw or a dab of wood glue to secure the shelf to the bracket. This is especially important in households with children or pets.
While the friction of the rods is usually sufficient to hold the shelf in place, a mechanical connection provides peace of mind. Just ensure the connection is reversible if you ever need to take the shelf down for maintenance or painting.
Comparing Fixed and Adjustable Bracket Systems
You have two main choices when it comes to supporting your shelves: fixed internal rods or adjustable rail systems. Fixed rods are the classic choice for a truly hidden look.
They provide a very clean aesthetic but offer zero room for error during installation. Once those holes are drilled into your wall and your wood, you are committed to that exact position.
Adjustable bracket systems, on the other hand, feature a long metal rail that mounts to the wall, with rods that can slide along the rail. This is a massive advantage when your stud layout isn’t perfect.
You can align the rods with your studs while still positioning the shelf exactly where you want it on the wall. These systems are often stronger as well, as they distribute the weight across a continuous steel rail rather than individual mounting points.
When pushing the maximum practical depth for a wood floating shelf (10″-12″), the rail system is often the superior choice. It provides more surface area for the bracket to grip the wall, which helps manage the increased leverage of a deeper shelf. While they are slightly more expensive, the ease of installation and the added structural security make them worth the investment for any project involving deeper, heavier shelving.
FAQ
Is 12 inches too deep for a floating shelf?
Twelve inches is the upper limit for most standard floating shelf applications. While it is possible to go deeper, you will need specialized heavy-duty hardware and must ensure your mounting points are perfectly aligned with the wall studs. Anything beyond 12 inches often requires additional support, such as decorative corbels or gussets, which moves the design away from a true “floating” look.
What is the best wood thickness for a 12-inch shelf?
For a shelf of this depth, you should aim for a thickness of at least 1.5 to 2 inches. This thickness provides enough structural mass to house the necessary support hardware and prevents the board from warping under its own weight or the weight of stored items.
Can I install floating shelves on drywall without hitting studs?
No, you should never attempt to install a 10-12 inch deep floating shelf into drywall alone. The leverage created by the depth of the shelf will eventually cause the hardware to rip through the drywall, damaging your wall and likely causing your items to fall. Always secure your brackets directly into the wall studs.
Why does my floating shelf sag at the front?
A sagging shelf is usually a sign of either inadequate bracket length or a loose connection to the wall. If the support rods do not penetrate deep enough into the wood, they cannot counteract the weight of the items. Check that your rods are at least 8-9 inches long and that the mounting screws are tight against the studs.
Are floating shelves still popular in 2026?
Yes, floating shelves remain a staple of modern interior design because they offer a clean, uncluttered look that adapts well to various styles. As long as they are installed correctly and styled thoughtfully, they remain a functional and aesthetic choice for any room in the home.
Conclusion
Achieving the perfect balance between form and function requires attention to detail. By understanding the mechanical limits and structural requirements, you can confidently integrate a deeper shelf into your home.
Focusing on the maximum practical depth for a wood floating shelf (10″-12″) allows you to maximize your storage capacity while maintaining a sleek, minimalist aesthetic. Always prioritize solid stud connections, use high-quality, long-reach hardware, and distribute your weight carefully to ensure your installation remains secure.
If you are planning to install these shelves yourself, start with a single shelf to test your mounting technique before committing to a larger project. Proper preparation is the difference between a temporary fix and a permanent, beautiful feature in your home. Feel free to experiment with different wood species and finishes to match your decor, and enjoy the process of creating a custom storage solution that is uniquely yours.